Creating a Dynamic Distribution Form
Navigate to "Forms" create the form as usual.
Click Edit to the right of the form
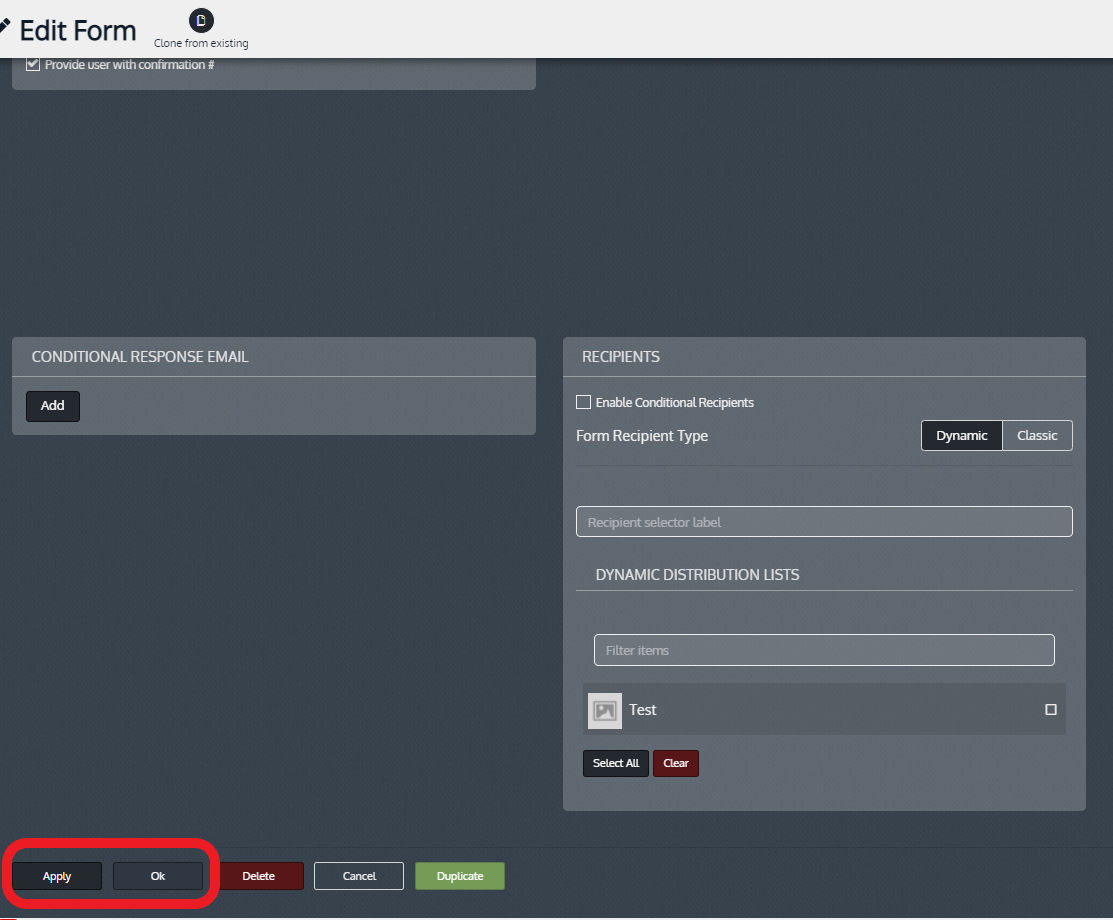
Navigate to "Submission Settings" tab, head to the "Recipients" field near the bottom-center of the page & select "Dynamic"
Add a recipient selector label if necessary & select a Distribution List(s)
Click "Apply" or "Ok" at the bottom-left side of the page.

Congratulations! You've successfully created Dynamic Distribution for the Form!
Related Articles
Creating a Dynamic Form Distribution List
Objective To provide a walkthrough on how to create a Dynamic Form Distribution List Click "Features", then click "Form Distribution Lists" in the Dashboard Click "+ New" Click "+ New" Name the List, Add the Recipient Emails you want to receive the ...Using a Dynamic Distribution for a Form from the Dashboard
From the Dashboard go to Features Then select Forms Next, click the pencil edit icon on the Form you would like to use Dynamic Distribution for Click the 'Submission Settings' tab at the top Scroll down, locate 'Form Recipient Type' Click 'Dynamic' ...People: Manage, Import, Export & Create Accounts
Objective To detail how you can manage, import, export, and create accounts in the Dashboard People section. People interface is set up to help you Manage, Import, Export and Create Accounts. Manage People All People records are listed here in the ...Create Single Classroom
Objective Provide a walkthrough on how to create a single Classroom Manually. There are 2 ways to Create Classrooms. You can either create new Classrooms one at a time or you can “Import” multiple "Classrooms" **NOTE: When a Classroom is made there ...Creating Conversations in the App
Objective To illustrate how to create Conversations in the App and manage existing Conversations. Creating a New Conversation in the App Navigate to Conversations Feature Find the 'Conversations' tab on the Menu Create a Conversation Press the '+' in ...